Blog reader was asking to provide a list of steps, to guide through install and run process for chatbot solution with TensorFlow, Node.JS and Oracle JET.
Resources:
1. Chatbot UI and context handling backend implementation - Machine Learning Applied - TensorFlow Chatbot UI with Oracle JET Custom Component
2. Classification implementation - Classification - Machine Learning Chatbot with TensorFlow
3. TensorFlow installation - TensorFlow - Getting Started with Docker Container and Jupyter Notebook
4. Source code - GitHub
Install and run steps:
1. Download source code from GitHub repository:

2. Install TensorFlow and configure Flask (TensorFlow Linear Regression Model Access with Custom REST API using Flask)
3. Upload intents.json file to TensorFlow root folder:

4. Upload both TensorFlow notebooks:

5. Open and execute (click Run for each section, step by step) model notebook:

6. Repeat training step few times, to get minimum loss:

7. Open and execute response notebook:

8. Make sure REST interface is running, see message below:

9. Test classification from external REST client:

10. Go to socketioserver folder and run (install Node.js before that) npm install express --save and npm install socket.io --save commands:

11. Run npm start to startup Node.js backend:

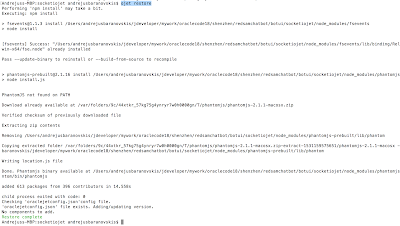
12. Go to socketiojet folder and run (install Oracle JET before that) ojet restore:
13. Run ojet serve to start chatbot UI. Type questions to chatbot prompt:

Resources:
1. Chatbot UI and context handling backend implementation - Machine Learning Applied - TensorFlow Chatbot UI with Oracle JET Custom Component
2. Classification implementation - Classification - Machine Learning Chatbot with TensorFlow
3. TensorFlow installation - TensorFlow - Getting Started with Docker Container and Jupyter Notebook
4. Source code - GitHub
Install and run steps:
1. Download source code from GitHub repository:

2. Install TensorFlow and configure Flask (TensorFlow Linear Regression Model Access with Custom REST API using Flask)
3. Upload intents.json file to TensorFlow root folder:

4. Upload both TensorFlow notebooks:

5. Open and execute (click Run for each section, step by step) model notebook:

6. Repeat training step few times, to get minimum loss:

7. Open and execute response notebook:

8. Make sure REST interface is running, see message below:

9. Test classification from external REST client:

10. Go to socketioserver folder and run (install Node.js before that) npm install express --save and npm install socket.io --save commands:

11. Run npm start to startup Node.js backend:
12. Go to socketiojet folder and run (install Oracle JET before that) ojet restore:

13. Run ojet serve to start chatbot UI. Type questions to chatbot prompt:

No comments:
Post a Comment