Showing posts with label Chatbot. Show all posts

Wednesday, April 24, 2019

Build it Yourself — Chatbot API with Keras/TensorFlow Model

Is not that complex to build your own chatbot (or assistant, this word is a new trendy term for chatbot) as you may think. Various chatbot platforms are using classification models to recognize user intent. While obviously, you get a strong heads-up when building a chatbot on top of the existing platform, it never hurts to study the background concepts and try to build it yourself. Why not use a similar model yourself. Chatbot implementation main challenges are:
  1. Classify user input to recognize intent (this can be solved with Machine Learning, I’m using Keras with TensorFlow backend)
  2. Keep context. This part is programming and there is nothing much ML related here. I’m using Node.js backend logic to track conversation context (while in context, typically we don’t require a classification for user intents — user input is treated as answers to chatbot questions)
Complete source code for this article with readme instructions is available on my GitHub repo (open source).

This is the list of Python libraries which are used in the implementation. Keras deep learning library is used to build a classification model. Keras runs training on top of TensorFlow backend. Lancaster stemming library is used to collapse distinct word forms:


Chatbot intents and patterns to learn are defined in a plain JSON file. There is no need to have a huge vocabulary. Our goal is to build a chatbot for a specific domain. Classification model can be created for small vocabulary too, it will be able to recognize a set of patterns provided for the training:


Before we could start with classification model training, we need to build vocabulary first. Patterns are processed to build a vocabulary. Each word is stemmed to produce generic root, this would help to cover more combinations of user input:


This is the output of vocabulary creation. There are 9 intents (classes) and 82 vocabulary words:


Training would not run based on the vocabulary of words, words are meaningless for the machine. We need to translate words into bags of words with arrays containing 0/1. Array length will be equal to vocabulary size and 1 will be set when a word from the current pattern is located in the given position:


Training data — X (pattern converted into array [0,1,0,1…, 0]), Y (intents converted into array [1, 0, 0, 0,…,0], there will be single 1 for intents array). Model is built with Keras, based on three layers. According to my experiments, three layers provide good results (but it all depends on training data). Classification output will be multiclass array, which would help to identify encoded intent. Using softmax activation to produce multiclass classification output (result returns an array of 0/1: [1,0,0,…,0] — this set identifies encoded intent):


Compile Keras model with SGD optimizer:


Fit the model — execute training and construct classification model. I’m executing training in 200 iterations, with batch size = 5:


Model is built. Now we can define two helper functions. Function bow helps to translate user sentence into a bag of words with array 0/1:


Check this example — translating the sentence into a bag of words:


When the function finds a word from the sentence in chatbot vocabulary, it sets 1 into the corresponding position in the array. This array will be sent to be classified by the model to identify to what intent it belongs:


It is a good practice to save the trained model into a pickle file to be able to reuse it to publish through Flask REST API:


Before publishing model through Flask REST API, is always good to run an extra test. Use model.predict function to classify user input and based on calculated probability return intent (multiple intents can be returned):


Example to classify sentence:


The intent is calculated correctly:


To publish the same function through REST endpoint, we can wrap it into Flask API:


I have explained how to implement the classification part. In the GitHub repo referenced at the beginning of the post, you will find a complete example of how to maintain the context. Context is maintained by logic written in JavaScript and running on Node.js backend. Context flow must be defined in the list of intents, as soon as the intent is classified and backend logic finds a start of the context — we enter into the loop and ask related questions. How advanced is context handling all depends on the backend implementation (this is beyond Machine Learning scope at this stage).

Chatbot UI:

Friday, November 9, 2018

Introduction to Oracle Digital Assistant Dialog Flow

Oracle Digital Assistant is a new name for Oracle Chatbot. Actually it is not only a new name - from now on chatbot functionality is extracted into separate cloud service - Oracle Digital Assistance (ODA) Cloud service. It runs separately now, not part of Oracle Mobile Cloud Service. I think this is a strong move forward - this should make ODA service lighter, easier to use and more attractive to someone who is not Oracle Mobile Cloud service customer.

I was playing around with dialog flow definition in ODA and would like to share few lessons learned. I extracted my bot definition from ODA and uploaded to GitHub repo for your reference.

When new bot is created in ODA service, first of all you need to define list of intents and provide sample phrases for each intent. Based on this information algorithm trains and creates machine learning model for user input classification:


ODA gives us a choice - to user simpler linguistics based model or machine learning algorithm. In my simple example I was using the first one:


Intent is assigned with entities:


Think about entity as about type, which defines single value of certain basic type or it can be a list of values. Entity will define type for dialog flow variables:


Key part in bot implementation - dialog flow. This is where you define rules how to handle intents and also how to process conversation context. Currently ODA doesn't provide UI interface to managed dialog flow, you will need to type rules by hand (probably if your bot logic is complex, you can create YAML structure outside of ODA). I would highly recommend to read ODA dialog flow guide, this is the most complex part of bot implementation - The Dialog Flow Definition.

Dialog flow definition is based on two main parts - context variables and states. Context variables - this is where you would define variables accessible in bot context. As you can see it is possible to use either basic types or our own defined type (entity). Type nlpresult is built-in type, variable of this type gets classified intent information:


States part defines sequence of stops (or dialogs), bot transitions from one stop to another during conversation with the user. Each stop points to certain component, there is number of built-in components and you could use custom component too (too call REST service for example). In the example below user types submit project hours, this triggers classification and result is handled by System.Intent, from where conversation flow starts - it goes to the dialog, where user should select project from the list. Until conversation flow stays in the context - we don't need to classify user input, because we treat user answers as input variables:


As soon as user selects project - flow transitions to the next stop selecttask, where we ask user to select task:


When task is selected - going to the next stop, to select time spent on this task. See how we are referencing previous answers in current prompt text. We can refer and display previous answer through expression:


Finally we ask a question - if user wants to type more details about task. By default all stops are executed in sequential order from top to bottom, if transition is empty - this means the next stop will execute - confirmtaskdetails in this case. Next stop will be conditional (System.ConditionEquals component), depending on user answer it will choose which stop to execute next:


If user chooses Yes - it will go to next stop, where user needs to type text (System.Text component):


At the end we print task logging information and ask if user wants to continue. If he answers No, we stop context flow, otherwise we ask user - what he wants to do next:


We are out of conversation context, when user types sentence - it will be classified to recognize new intent and flow will continue:


I hope this gives you good introduction about bot dialog flow implementation in Oracle Digital Assistant service.

Monday, July 30, 2018

Text Classification with Deep Neural Network in TensorFlow - Simple Explanation

Text classification implementation with TensorFlow can be simple. One of the areas where text classification can be applied - chatbot text processing and intent resolution. I will describe step by step in this post, how to build TensorFlow model for text classification and how classification is done. Please refer to my previous post related to similar topic - Contextual Chatbot with TensorFlow, Node.js and Oracle JET - Steps How to Install and Get It Working. I would recommend to go through this great post about chatbot implementation - Contextual Chatbots with Tensorflow.

Complete source code is available in GitHub repo (refer to the steps described in the blog referenced above).

Text classification implementation:

Step 1: Preparing Data
  • Tokenise patterns into array of words
  • Lower case and stem all words. Example: Pharmacy = pharm. Attempt to represent related words 
  • Create list of classes - intents
  • Create list of documents - combination between list of patterns and list of intents
Python implementation:


Step 2: Preparing TensorFlow Input
  • [X: [0, 0, 0, 1, 0, 1, 0, 1, 0, 0, 0, 0, 0, 1, ...N], Y: [0, 0, 1, 0, 0, 0, ...M]]
  • [X: [0, 1, 0, 0, 0, 1, 0, 0, 0, 0, 1, 0, 1, 0, ...N], Y: [0, 0, 0, 1, 0, 0, ...M]]
  • Array representing pattern with 0/1. N = vocabulary size. 1 when word position in vocabulary is matching word from pattern
  • Array representing intent with 0/1. M = number of intents. 1 when intent position in list of intents/classes is matching current intent
Python implementation:


Step 3: Training Neural Network
  • Use tflearn - deep learning library featuring a higher-level API for TensorFlow
  • Define X input shape - equal to word vocabulary size
  • Define two layers with 8 hidden neurones - optimal for text classification task (based on experiments)
  • Define Y input shape - equal to number of intents
  • Apply regression to find the best equation parameters
  • Define Deep Neural Network model (DNN)
  • Run model.fit to construct classification model. Provide X/Y inputs, number of epochs and batch size
  • Per each epoch, multiple operations are executed to find optimal model parameters to classify future input converted to array of 0/1
  • Batch size
    • Smaller batch size requires less memory. Especially important for datasets with large vocabulary
    • Typically networks train faster with smaller batches. Weights and network parameters are updated after each propagation
    • The smaller the batch the less accurate estimate of the gradient (function which describes the data) could be
Python implementation:


Step 4: Initial Model Testing
  • Tokenise input sentence - split it into array of words
  • Create bag of words (array with 0/1) for the input sentence - array equal to the size of vocabulary, with 1 for each word found in input sentence
  • Run model.predict with given bag of words array, this will return probability for each intent
Python implementation:


Step 5: Reuse Trained Model
  • For better reusability, it is recommended to create separate TensorFlow notebook, to handle classification requests
  • We can reuse previously created DNN model, by loading it with TensorFlow pickle
Python implementation:


Step 6: Text Classification
  • Define REST interface, so that function will be accessible outside TensorFlow
  • Convert incoming sentence into bag of words array and run model.predict
  • Consider results with probability higher than 0.25 to filter noise
  • Return multiple identified intents (if any), together with assigned probability
Python implementation:

Tuesday, July 10, 2018

Contextual Chatbot with TensorFlow, Node.js and Oracle JET - Steps How to Install and Get It Working

Blog reader was asking to provide a list of steps, to guide through install and run process for chatbot solution with TensorFlow, Node.JS and Oracle JET.

Resources:

1. Chatbot UI and context handling backend implementation - Machine Learning Applied - TensorFlow Chatbot UI with Oracle JET Custom Component

2. Classification implementation - Classification - Machine Learning Chatbot with TensorFlow

3. TensorFlow installation - TensorFlow - Getting Started with Docker Container and Jupyter Notebook

4. Source code - GitHub

Install and run steps:

1. Download source code from GitHub repository:


2. Install TensorFlow and configure Flask (TensorFlow Linear Regression Model Access with Custom REST API using Flask)

3. Upload intents.json file to TensorFlow root folder:


4. Upload both TensorFlow notebooks:


5. Open and execute (click Run for each section, step by step) model notebook:


6. Repeat training step few times, to get minimum loss:


7. Open and execute response notebook:


8. Make sure REST interface is running, see message below:


9. Test classification from external REST client:


10. Go to socketioserver folder and run (install Node.js before that) npm install express --save and npm install socket.io --save commands:


11. Run npm start to startup Node.js backend:


12. Go to socketiojet folder and run (install Oracle JET before that) ojet restore:


13. Run ojet serve to start chatbot UI. Type questions to chatbot prompt:

Monday, June 11, 2018

Machine Learning Applied - TensorFlow Chatbot UI with Oracle JET Custom Component

This post is based on Oracle Code 2018 Shenzhen, Warsaw and Berlin talks. View presentation on SlideShare:


In my previous post I have outlined how to build chatbot backend with TensorFlow - Classification - Machine Learning Chatbot with TensorFlow. Today post is the next step - I will explain how to build custom UI on top of TensorFlow chatbot with Oracle JET.

You can download complete source code (which includes TensorFlow part, backend for chatbot context processing and JET custom component chatbot UI) from my GitHub repository.

Here is solution architecture snapshot:


TensorFlow is used for machine learning and text classification task. Flask allows to communicate through REST to TensorFlow from outside. Contextual chatbot conversation processing is implemented in Node.js backend, communication with Oracle JET client is handled by Socket.io.

Key point in chatbot implementation - correct data structure construction for machine training process. More accurate learning will be, better classification results will be achieved afterwards. Chatbot training data can come in the form of JSON. Training data quality can be measured by overlap between intents and sample sentences. As more overlaps you have, weaker machine learning output will be produced and classification will be less accurate. Training data can contain information which is not used directly by TensorFlow - we can include intent context processing into the same structure, it will be used by context processing algorithm. Sample JSON structure for training data:


Accurate classification by TensorFlow is only one piece of chatbot functionality. We need to maintain conversation context. This can be achieved in Node.js backend, by custom algorithm. In my example, when context is not set - TensorFlow is called to classify statement and produce intent probability. There might be multiple intents classified for the same sentence - TensorFlow will return multiple probabilities. It is up to you, either to always choose intent with top probability or ask user to choose. Communication back to the client is handled through Socket.io by calling socket.emit function:


If context was already set, we don't call classification function - we don't need it in this step. Rather we check by intent context mapping - what should be the next step. Based on that information, we send back question or action to the client, again through Socket.io by calling socket.emit function:


Chatbot UI is implemented with JET custom component (check how it works in JET cookbook). This makes it easy to reuse the same component in various applications:


Here is example, when chatbot UI is included into consuming application. It comes with custom listener, where any custom actions are executed. Custom listener allows to move any custom logic outside of chatbot component, making it truly reusable:


Example for custom logic - based on chatbot reply, we can load application module, assign parameter values, etc.:


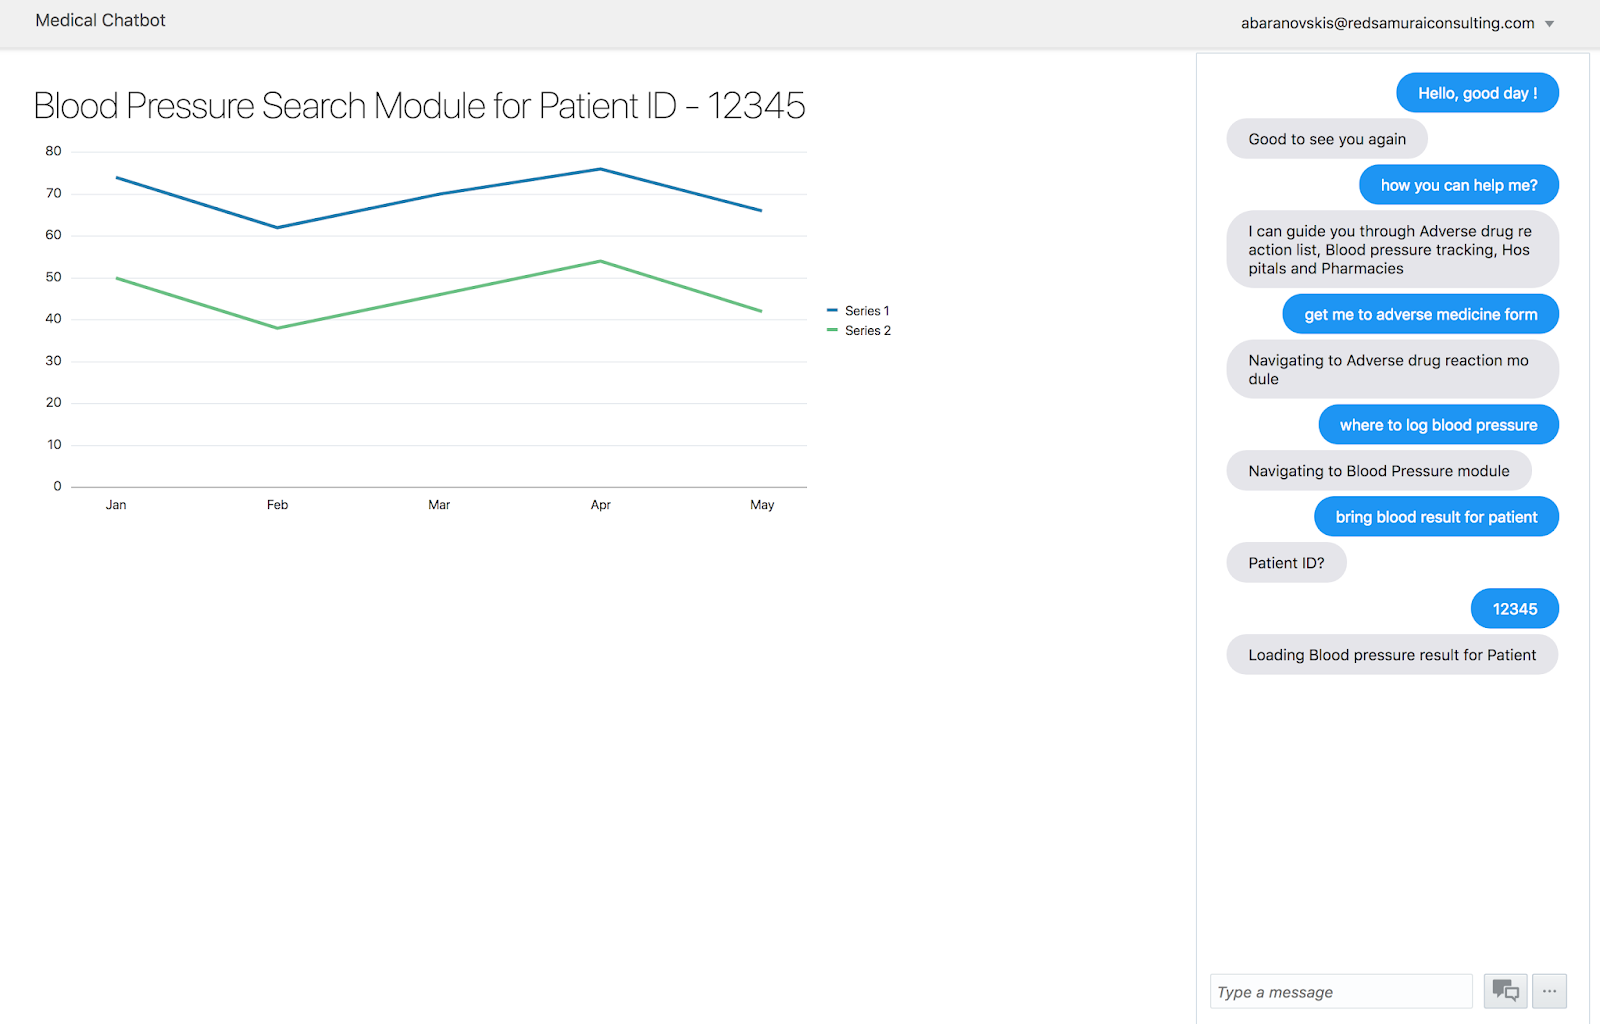
Chatbot UI implementation is based on the list, which renders bot and client messages using the template. This template detects if message belongs to client or bot and applies required style - this helps to render readable list. Also there is input area and control buttons:


JS module executes logic which helps to display bot message, by adding it to the list of messages generates event to be handled by custom logic listener. Message is sent from the client to the bot server by calling Socket.io socket.emit function:


Here is the final result - chatbot box implemented with Oracle JET: